


To assemble your walker, you'll need glue. We recommend Thick Super Glue, because it not only holds nicely, it fills those small gaps between pieces. You'll also need a file (small metal hobby files are best, but a nail file will do) to smooth any rough spots, and something to cut the pieces off their sprues. Small diagonal cutter pliers are best, but a pair of nail clippers will work well enough.
Seven pieces make up the dolphin and its walker: main body, tail, aft legs, fore legs, arms sprue, breast piece, and battlemask. Be sure to consult the visual guide and identify the parts before separating each piece from its sprue.

The main body has the head and the bulk of the body, including the dorsal fin.

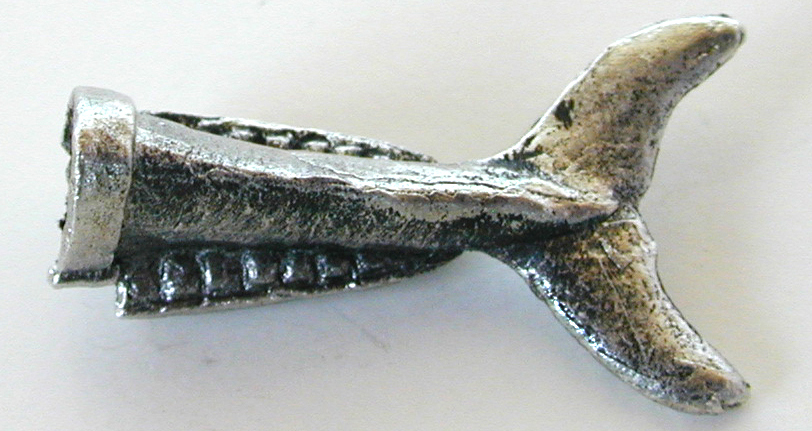
The tail has two flukes on on end, and an oval flat surface on the other.
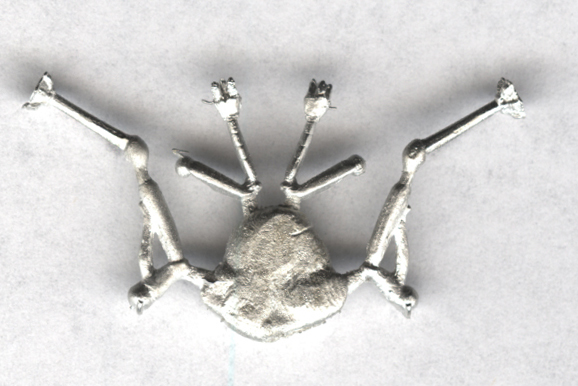
The fore legs sprue (left) has the two fore legs, attached at the base of the feet. The arms/aft legs sprue (center) has two aft legs (the longer, outer pieces) and two arms (the shorter, inner pieces). The mask and breast plate (right) have no sprues.
Putting a fen walker together is a fairly simple process.
First, remove the pieces from the sprues. Glue the chest plate and the tail to the main body.
Attach the fore legs to the chest plate and the aft legs to the rear sides of the main body, and the arms to the front sides.
Attaching the warmask is optional. Prime and paint.
Use the cutters to separate the parts from the main sprues. As a general rule of thumb, leave the sprues long, then trim them down later, after fitting the piece to the torso. If a small amount of the sprue remains on the piece, use a file to smooth it away.
The fore legs connect to the sprue at the bottom of the feet. Once removed from the sprue, the feet can be easily filed flat.
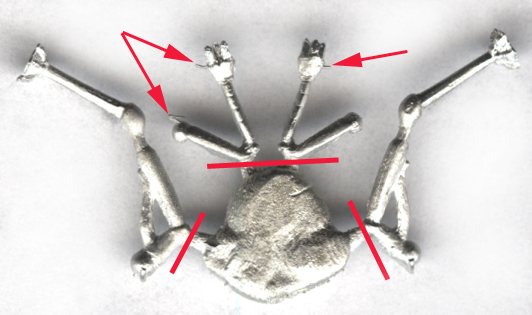
The aft legs are attached at the uppermost "knee." When cutting, be sure to leave 1/8" of sprue attached to the leg, to be gently filed down later. The arms are attached to the sprue at the elbow. We recommend removing the aft legs first, then the arms.
Attaching the Chest to the Body
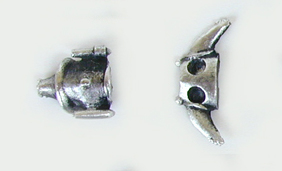
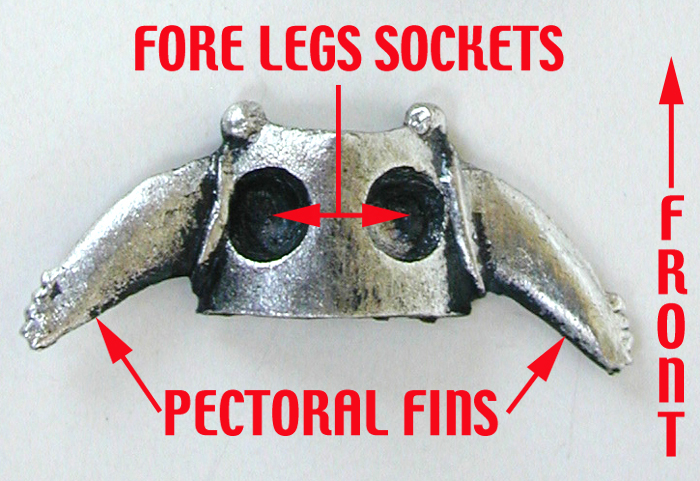
The pectoral fins of the chest plate obviously lie horizontally, but deciding which side is up can be less easy. If you've already attached the fore legs, that's obviously the bottom. If you haven't, the side with two round sockets is the bottom; the side with the stock number tag is the top.
This image shows the bottom of the chest piece, with the important details labeled. The "nubs" on the fins are the dolphin's vestigial fingers.
We recommend attaching the fore legs after attaching the chest to the body. It makes it easier to get a firm connection between the chest plate and the main body, and to insure the feet on the fore legs are flat on the ground.
The joint on the bottom of the main body is large, and just behind the chin. The image below is the top of the chest plate and the underside of the dolphin body. Note the notch in the chest plate, and the block that fits into it on the body.


Orienting the tail is very simple. The narrowest edge is the top. The tail fins should lie horizontally.
As you can see, the joint is wide and flat, and the main body has a large lip to orient the tail.


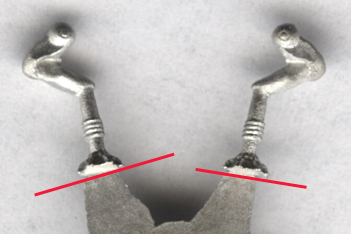
Each fore leg has two "knees," bending in opposite directions. The flat surface is the "foot," and the ball is the joint between the leg and the body. The key to orienting these legs is the direction of the lower joint; it should be pointing forward. When you are attaching the legs to the breast plate, the pectoral fins are pointing to the rear of the body. Align the lower knee to point generally in the opposite direction.
Here a fore leg is being attached to the chest plate. The ball on the top of the leg goes into the socket on the chest. Note the orientation of the upper knee in relation to the front of the plate; it points toward the front. For clarity, this image shows the leg being attached to the plate before the plate is attached the body. We don't recommend this, especially after trying to take this picture! Those fins are hard to hold onto!

The joint between the ball at the top of the fore leg and the socket in the bottom of the chest plate will be loose. This design allows you to position the leg in a variety of poses. For a flat-footed pose, the uppermost segment of the leg should be at about 45 degrees off the chest plate. Bringing the upper leg segment closer to the plate will make the dolphin walk on his toes, and moving it farther will lift the foot forward.
Since this joint is on the underside of the body, and the fit is fairly loose, very little cleanup on the joint area should be necessary.
The aft legs attach to the hip area of the main body with a ball-and-socket joint. However, to facilitate the feet sitting flat on the ground, the leg has a positive extrusion, which fits into the groove on the hip. This allows the leg to be positioned in several different ways, but keeps the feet on the ground.
[image of the ball and its positive groove, next to the hip socket and its negative groove]
Note the groove on the hip socket on the dolphin body.

The arms are another simple ball-and-socket joint, designed to fit loosely to give a wide range of poses.
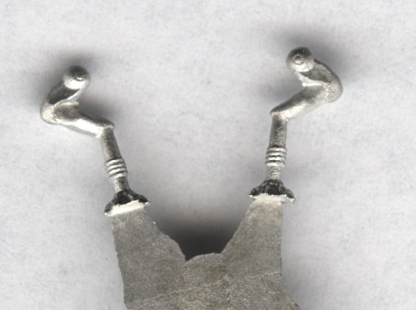
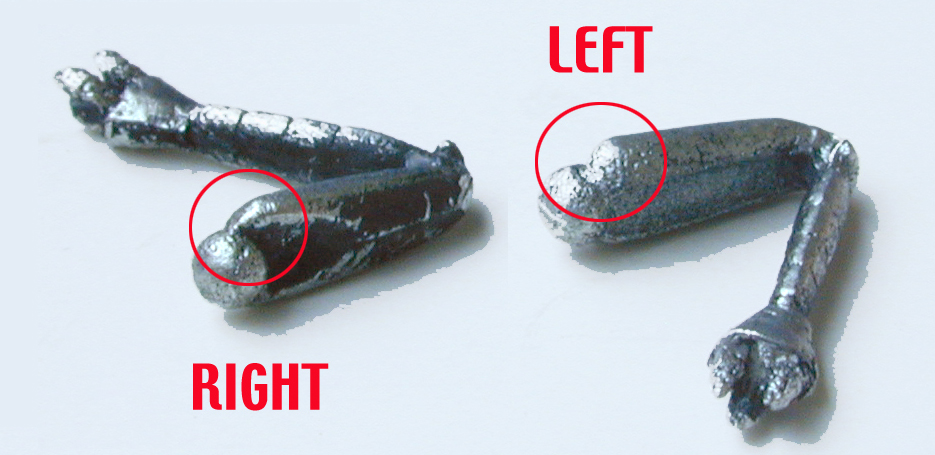
The first step is to identify which arm is which. As shown in the image below, each arm has a bulge on the top of the shoulder. Place both arms on a flat surface, with the bulges on top. The hands of the arms will point in opposite directions, making differentiating them simple.

Once the arm is confirmed to be in the correct socket, it can be rotated outward into position.

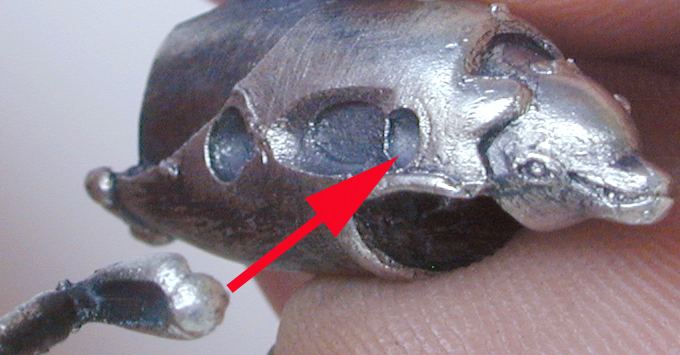
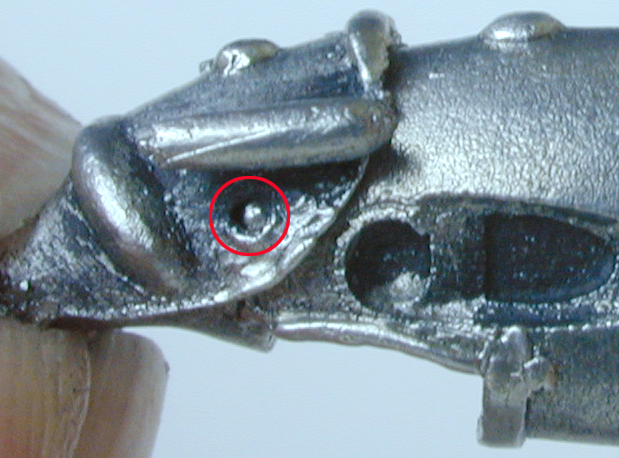
The Warmask will fit quite snugly on the fen's face. The hole on the side of the mask fits over the pin on the left side of the head.

Once the glue has dried (overnight is normal, but check the directions to be certain), the model can be primered. Given the angles on the walker and its legs, you'll need to spray it from as many angles as possible. A good technique would be to spray the walker as it is standing, let the primer dry, then lie it down on its side, allowing the spray to reach the underside.
As for paints, we recommend Reaper's Pro Paint line. In particular, a combination of Night Sky, Armor Gray, and Dove Gray is good for the dolphin body. For the walker, Sunlight does a good job of duplicating "diver's yellow," especially with a few Bright Blue details. The weapons on the warmask look good with Dragon Red and Dragon White details.